Userflow empowers you to create virtually any type of Flow to guide users, but the most effective Flows share key characteristics that drive real engagement and adoption. Rather than overwhelming users with passive "Next-Next-Next" tours that explain every feature, successful Flows focus on action-based guidance that helps users accomplish meaningful tasks. Think of it as the difference between reading a manual and having a knowledgeable colleague show you exactly what you need to do. By following the best practices in this guide, you'll learn how to design Flows that don't just inform users about your product—they actively help them experience its value firsthand, leading to faster time-to-value, higher activation rates, and those crucial "Aha!" moments that turn new users into engaged customers.
Don’t tell, Drive action
Don’t: Build Next-Next-Next tours
A typical application of product tours is to create introductory Flows that clarify menu options in your user interface. However, these types of tours tend to lack user engagement because they do not prompt any action. As a result, many users will swiftly navigate through these Flows or close them.
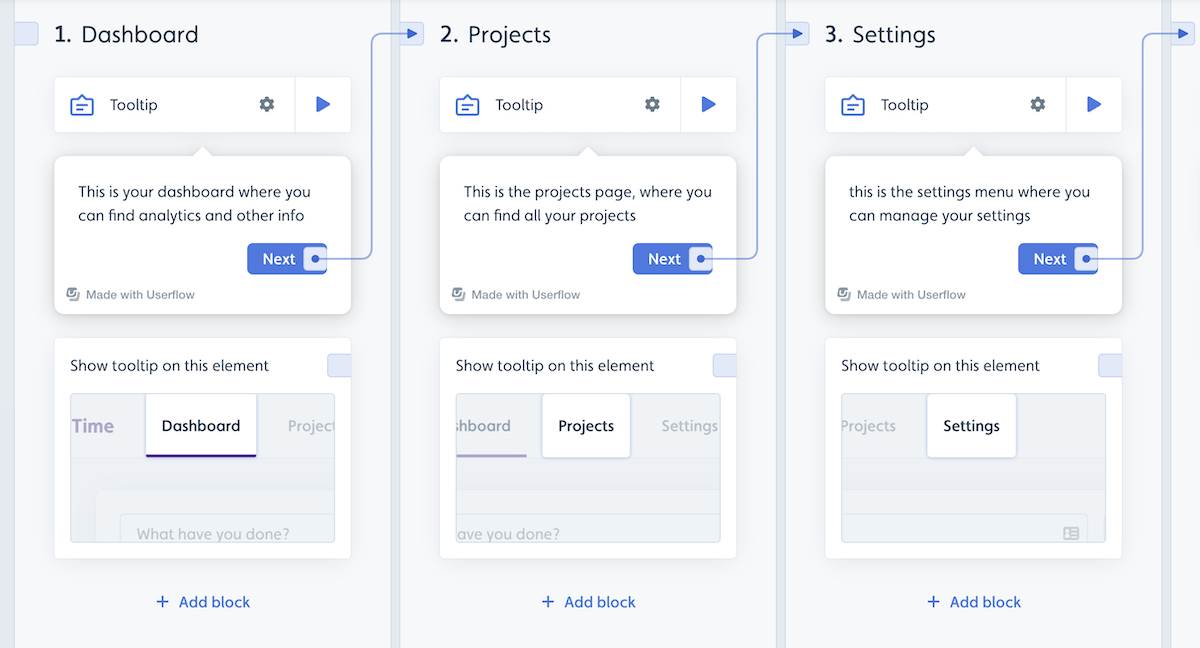
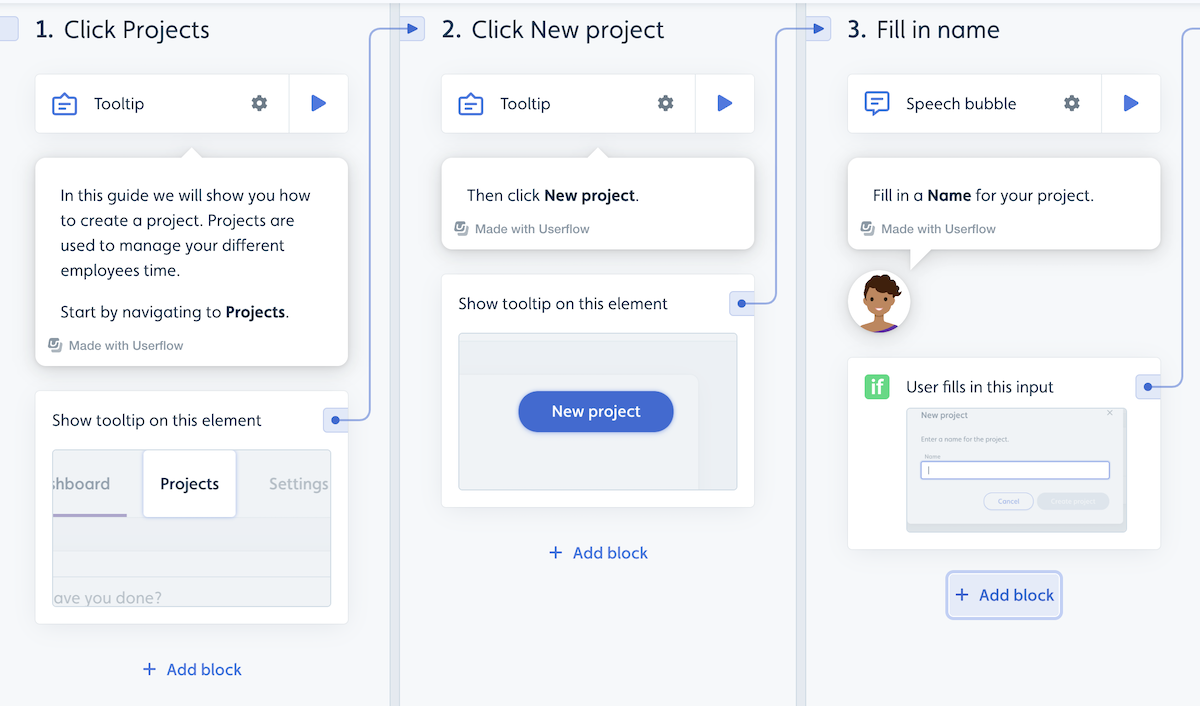
Do: Build action-based Flows that drive towards the “Aha!” moment
A better way to build onboarding is to build action-based Flows that drive your users to key “Aha!” moments. For example, we at Userflow use our first intro Flow to guide new users through building a Flow and show how easy it is.
Boost engagement with interactive flow elements
Each interactive element should serve a clear purpose within your Flow's objectives while respecting the user's time and attention. The right balance of passive content and active participation creates a dynamic experience that keeps users engaged and invested through to completion. You can trigger steps based on in-app interaction to improve user engagement. When that isn’t an option, add a button or other trigger to advance the user through the Flow.
Step triggers (if this, then that)
Use Triggers to create "if this, then that" navigation rules. A trigger can perform an action based on conditions such as:
An element is present, clicked, or disabled.
A user completing an input field.
The user reaches a specific page (URL).
Action buttons
Add action buttons to your steps that drive clear next steps. When activated, an action can be specified, such as Go to step (to navigate to another step) or Start new Flow/Checklist.
By combining these elements, you ensure the user is actively participating, rather than just clicking "Next-Next-Next.”
Add buttons to your Flow, and then branch the next step for each to point to another customized flow or other paths for a highly relevant experience.
Ask Questions
Add short, focused survey questions (using the Question block) that feel valuable rather than burdensome.
Post a quick Flow with a question or two about a new feature to get user feedback. Track actual product usage and turn that into a segment for auto-start condition targeting.
Use survey questions to create different paths in a Flow. The user’s response to a question can branch to a different flow or branch to specific steps for a unique path in a Flow.
Be clear and concise in your text
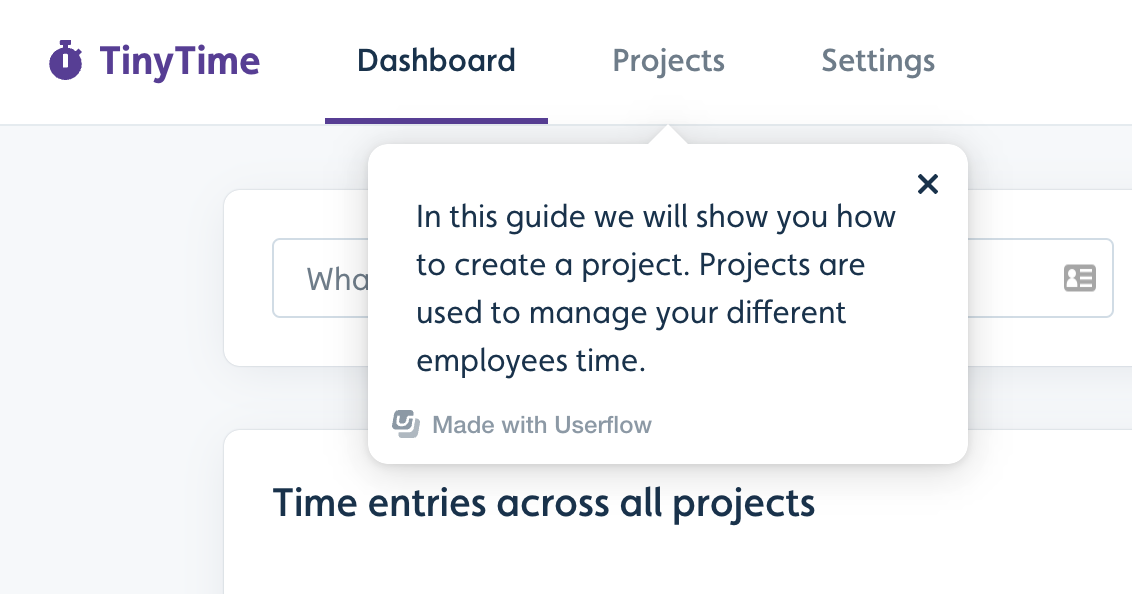
Don’t: Assume that users know what to do
Just because you point a beacon or Tooltip to an element in your app, it is not always clear to the user that they need to click the item. Provide clear guidance to help your users progress to completion.
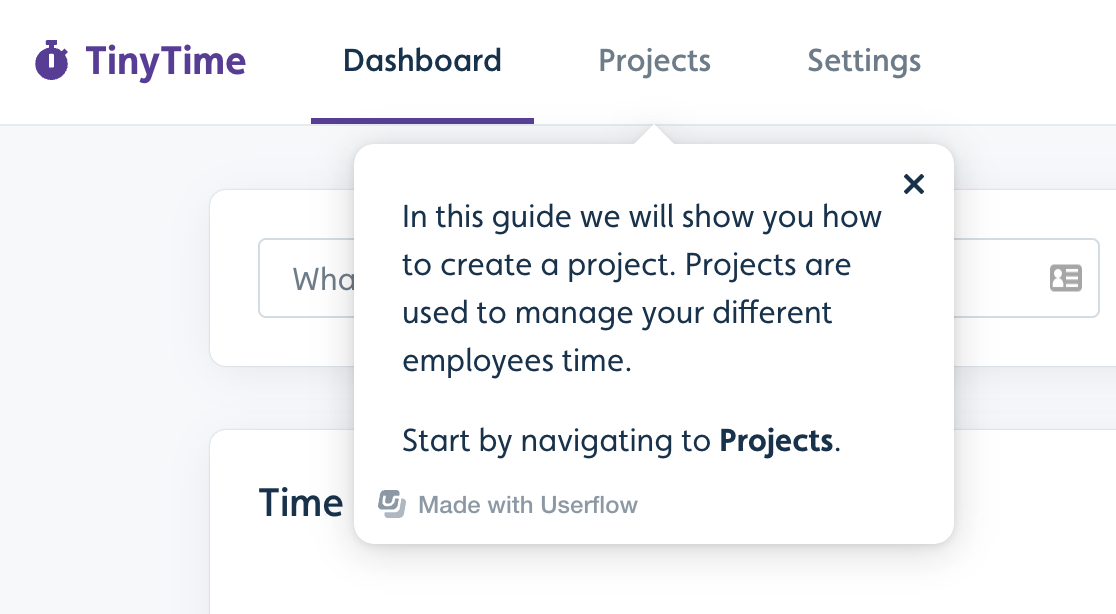
Do: Be clear and concise about the actions you want users to take
To ensure the user takes the action, keep the Flow step clear and concise. For example, by making a single action line with the action to take.
End a Flow properly
Users can dismiss flows at any time via the X-button in the top corner of modals, speech bubbles, and tooltips. While you can disable this button in advanced settings, we generally don't recommend it.
You can also add Dismiss actions to buttons, tooltip target clicks, survey questions, and step triggers.
Best Practice: Always add a dismiss action on the last step to provide a clear call-to-action.
Note: When using Start a flow actions, the current flow automatically dismisses. Other actions like, Navigate to page require explicit dismiss actions.
Important: Ensure flows eventually dismiss or hide to prevent blocking other flows from starting.
Completing a Flow
Flow completion differs from dismissal. A flow is considered complete when users reach a completion step. By default, the last step is the completion step, but you can designate any step as an Explicit completion step in the builder.
For conditional completion:
If you want a flow to complete only when users click a specific button, add a hidden step after that button
Configure this hidden step with an "always true" trigger (Water is wet) and a dismiss action
Customizing X-Button Behavior
By default, clicking the X-button dismisses a flow or checklist. You can modify this behavior in theme settings to display an exit menu with options to resume, close (dismiss), or restart the flow.
Note: This exit menu appears only on steps beyond the first step.
Keep it brief
Users tend to drop off after step four in a Flow, and completion rates can drop sharply if a Flow exceeds six steps.
Keep your Flows as brief as possible.
Use encouraging language that energizes your users to continue to each step. As you’re nearing the last few steps, tell them they’re almost done to persuade them to complete the Flow