Publishing an Action Flow doesn't make it available to your users. Adoption Agent only recommends Action Flows that have been added to it as a source and trained on. This is a separate step in a separate part of Userflow.
You'll need a published Action Flow before you start. See Create an Action Flow.
Step 1: Add Action flows as a source
Open your Adoption Agent.
Click Add source (or Add another source if the Agent already has sources).
Select Action flows — Suggest action flows.
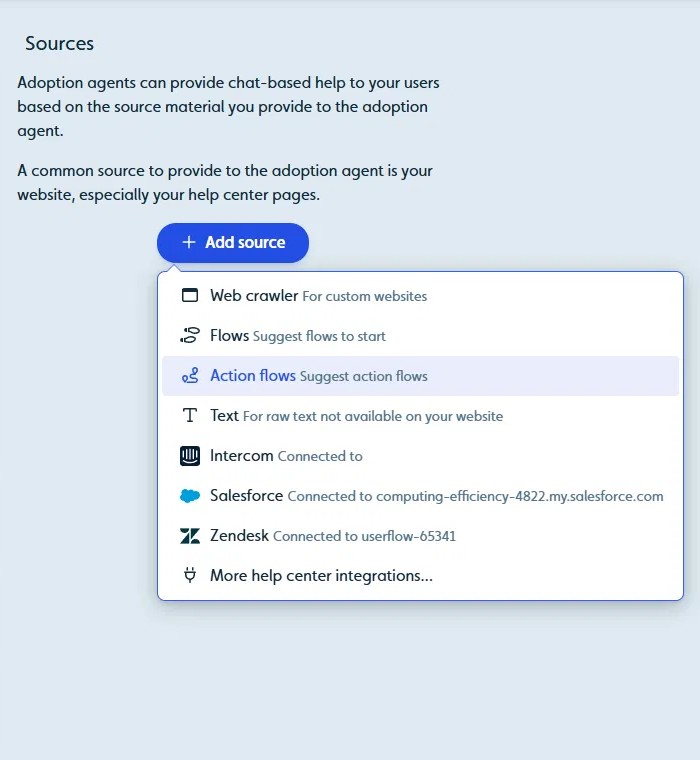
The Action flows source panel opens on the right, showing Action flows to suggest.
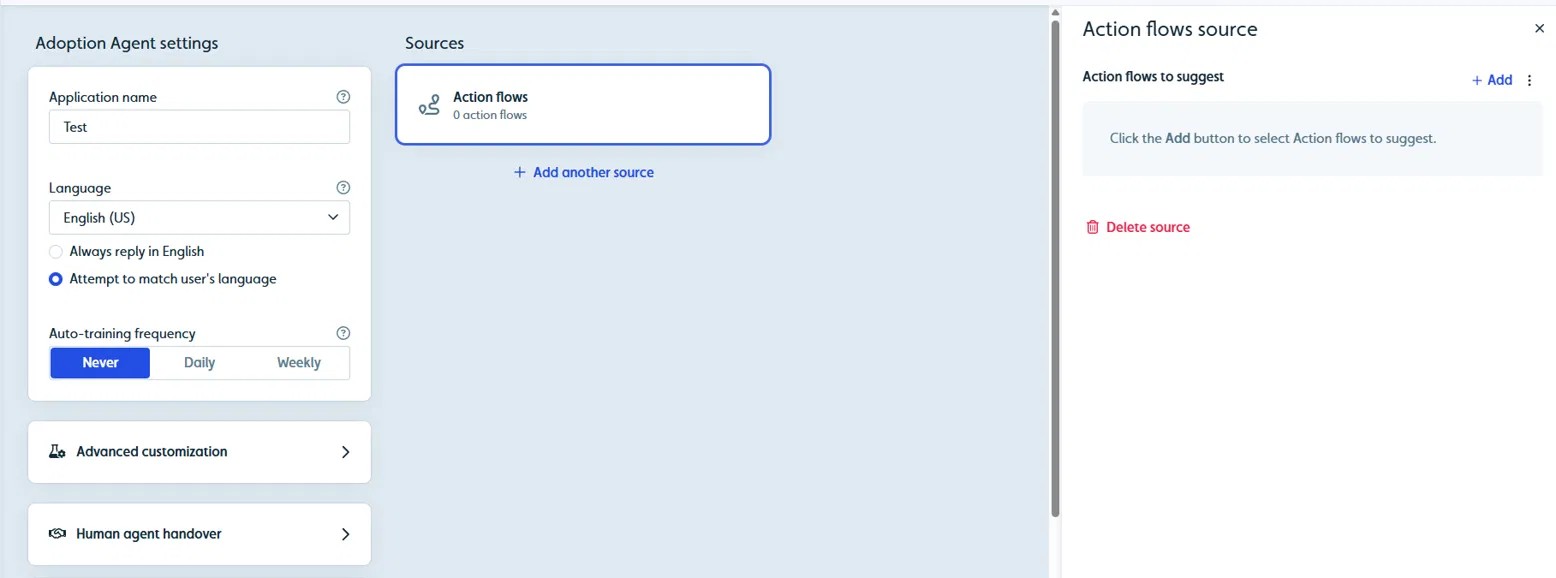
Step 2: Select the Action Flows to suggest
In the Action flows to suggest panel, click + Add.
Select the Action Flows you want this Agent to be able to run.
Click an Action Flow in the list to set its Action flow icon. Choose a built-in icon, upload an image, or point to an image URL. This is the icon users see alongside the flow when the Agent recommends it.
In the same panel, turn on Only suggest action flow if… to limit who the flow is offered to.
Only suggest action flow if… works the same way as conditions on a Flow source: the Agent will only suggest the Action Flow to users who match. If a task is only relevant to some of your users — admins, a particular segment, users on a specific setup — set the condition here rather than relying on the Agent to work it out.
Step 3: Train the Agent
Click Train. As with every other change to an Adoption Agent, the new source isn't live until the Agent has been retrained.
Step 4: Test it
Open Test chat and ask for the task the way a user would — "I want to add a team member," not the flow's internal name.
The Agent should reply with a card showing the Action Flow's public name. If your Agent also has a knowledge-base answer for the question you asked, it will lead with that answer and show the card below it. That's expected behavior, not a miss — check for the card underneath the answer before assuming the flow wasn't matched. Clicking the card in Test chat won't execute anything, because execution needs the Resource Center and the widget. Test chat is for confirming the right flow gets recommended for the right question. You've already verified that it executes correctly when you previewed it in the builder.
If the wrong flow comes back, or nothing does, the fix is almost always the Summary of action flow field on the flow itself rather than anything in the Agent. See Create an Action Flow.
Test chat doesn't count against your subscription credits.
If a Flow and an Action Flow cover the same topic
When both a Flow and an Action Flow match what a user asked, the Agent recommends one of them, not both. This is intended: offering two ways to do the same thing puts another decision in front of someone who just asked for help.
That means you can build both for the same task and only ever see one surface. If you want a specific one offered, remove the other from the Agent's sources.
This is separate from the knowledge-base answer behavior described above. A knowledge-base answer and one recommendation card can appear together; two recommendation cards for the same topic will not.
Step 5: Publish the Agent
Click Publish, select the environments to publish to, and confirm.
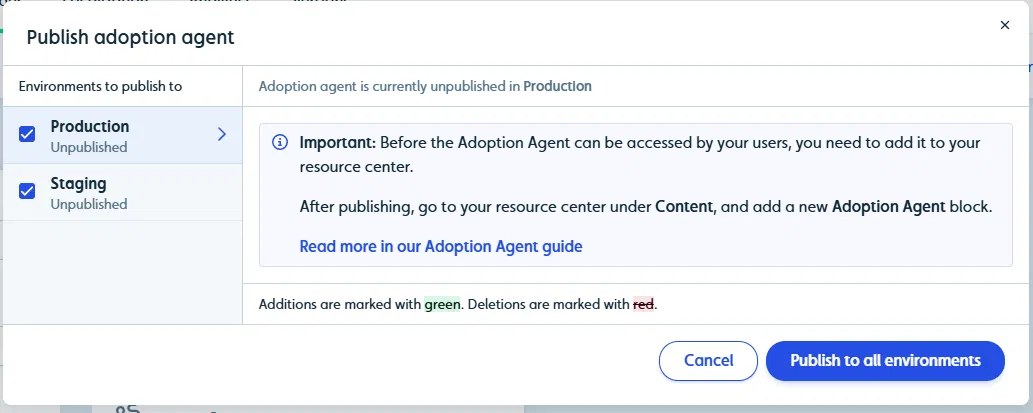
If you haven't already added this Adoption Agent to a Resource Center, do that now — the publish dialog will remind you. Go to your Resource Center, and under Content, add a new Adoption Agent block. Users can't reach the Agent, or any Action Flow, until that block exists. See Resource Center Implementation Guide.
Keeping Action Flows accurate
An Action Flow depends on the elements it was built against. If you change the UI those steps point at, the flow will start failing at that step — the Agent will try for the configured wait time, then stop the run.
Check the Analytics tab on the Action Flow after any release that touches the screens it uses. The step funnel shows which step users stop at, which tells you exactly where the flow broke.