At a glance | |
|---|---|
Audience | Teams with flows, checklists, banners or announcements live in Userflow who want them to keep working without overwhelming their users |
You will be able to | Label everything that's live, cut back what users see on their own, and fix the flows that don't start, show or finish |
What you need | An AI tool that supports skills (such as Claude or ChatGPT), the Userflow MCP (included on every plan), and editor access or above in Userflow to apply changes |
Overview
As your Userflow account grows, in-app content builds up. Flows (also called guides or tours) break when your app changes, old items keep showing after their campaign has ended, and new users can get several tours and pop-ups in a row. This playbook sets up a regular check of everything that's live. It labels your content so you can see what is running and who it is for, finds where users get too much at once, and finds the flows that will fail before your users run into them.
An MCP connects your AI tool to another product so it can read and work in it. The Userflow MCP connects it to your Userflow account.
A skill is a set of instructions your AI tool follows for one job, so your prompts can stay short.
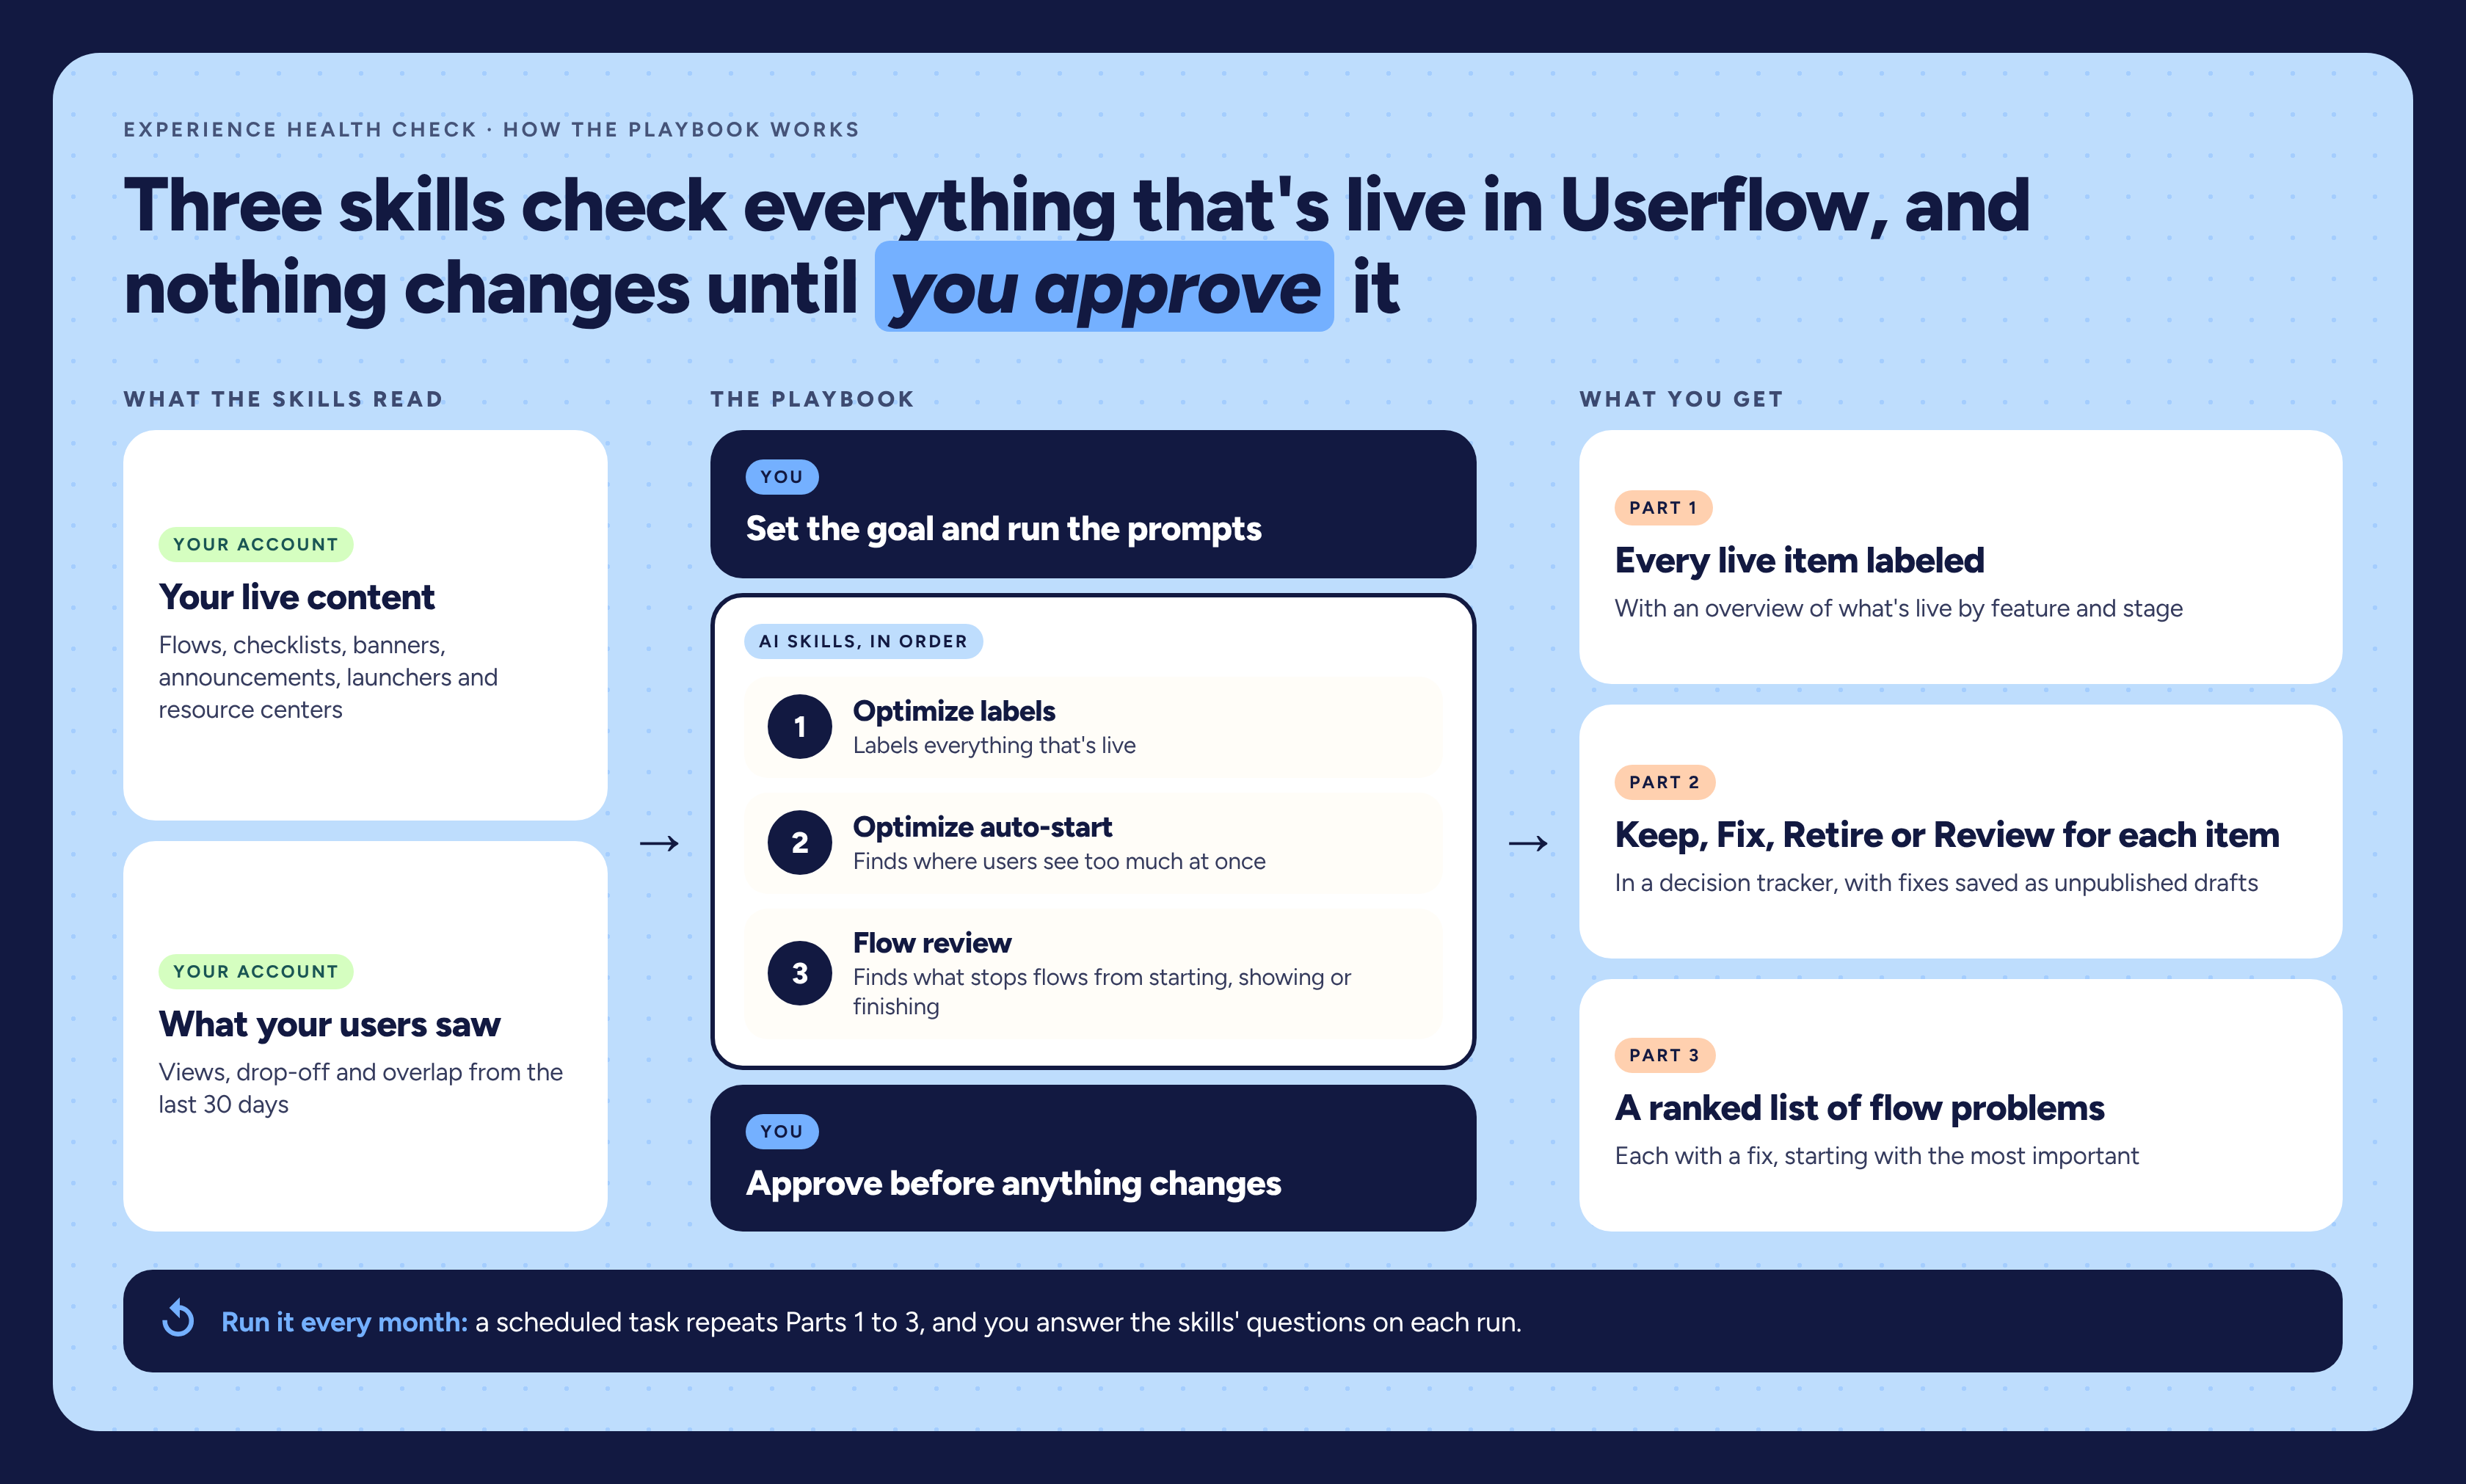
A playbook is a set of skills that work together toward one goal. This playbook uses three: Optimize labels, Optimize auto-start and Flow review.
Think of it as a robot sandwich: you set the goal, the skill does the work, and a person approves the result. Nothing in your account changes until you say yes: labels are applied only after you approve the plan, auto-start fixes are saved as unpublished drafts, items are unpublished only after you confirm the list, and the flow review only reports.
4 Parts make up this playbook | What you do | What you have at the end |
|---|---|---|
1. Label what's live | Approve a label system and the labels for each live item | Every live item labeled, and an overview of what's live by feature and stage |
2. Stop showing users too much at once | Run the auto-start audit and choose which changes to apply | A decision tracker for your team, and approved fixes saved as unpublished drafts |
3. Find and fix broken flows | Review your live flows and fix the top problems | A ranked list of flow problems, each with a fix |
4. Run the health check on a schedule | Schedule Parts 1 to 3 and answer the skills' questions on each run | A monthly check of labels, overlap and broken flows |
Get set up
Step 1: Connect the Userflow MCP
The Userflow MCP lets your AI tool read and create things in your Userflow account. Follow Connect Userflow to Claude, ChatGPT, and other AI tools with the Userflow MCP.
Step 2: Connect your spreadsheet and docs tools (optional)
In your AI tool, connect a spreadsheet tool such as Google Sheets or Excel if you want the auto-start audit in Part 2 to create its decision tracker there. Without one, the skill gives you an .xlsx or CSV file instead. If your team keeps its label rules in a doc or sheet, connect the tool that holds them (such as Google Drive, OneDrive, Notion or Confluence) so the labels skill in Part 1 can read them, or paste the rules in when it asks. Most AI tools call these connectors.
Step 3: Add the skills
Download the three skill files:
Then add each file to your AI tool:
ChatGPT: add each file as a skill:
Start a new chat in ChatGPT and upload the skill file.
Type
@skill-creatorand ask ChatGPT to review the file and create the skill. For example:@skill-creator Review this file and create the skill.Once the skill is created, install it. You can then start using it.
Claude: go to Customize → Add → Upload a skill and drop each file there.
You don't need to name or set up the skills. The prompts below run them.
Using an AI tool other than Claude/ChatGPT? Most tools that support skills use the same file format. See the AI Skills Library for how skills work.
Part 1: Label what's live
The Optimize labels skill gives every live flow, checklist, launcher, banner, announcement and resource center a small set of labels: a Feature label for the part of your product it helps with, a Stage label for where it sits in the customer journey, and an Audience label when it's limited to one plan, role or segment. If you don't have a label system yet, the skill proposes one built from your own content. Labels go live as soon as they're applied, so the skill shows its plan and waits for your yes before it creates or applies any label. The auto-start audit in Part 2 also reads these labels to work out what each item is for.
Step 1: Label your live content
Time: 10 mins
The skill tells you which Userflow account and environment it's connected to, checks your existing labels, and asks once whether your team keeps label rules in a doc. If it proposes a label system, correct it and approve it. It then shows the labels it plans to add, grouped by pattern (for example, 14 items get Feature: Reports and Stage: Adoption). Test items, copies, items aimed at one person and items with an unclear purpose go on a separate needs-a-decision list instead of being guessed at. Approve all of the plan, some of it, or edit it. Open a new conversation in your AI tool and run this prompt:
Label everything that's live in our Userflow account.Or open it directly within your AI agent:
When the labels are applied, you get an overview: a grid of live items by Feature and Stage, features with no live content, stages with a lot of content that starts on its own, and the needs-a-decision list. The skill adds labels and never removes any. To delete a label you no longer need, click on the label for the flow, etc. and select “manage labels”.
Part 2: Stop showing users too much at once
The Optimize auto-start skill looks at everything that starts or shows on its own: auto-start flows and checklists, banners, and popup announcements. It works out which items can reach the same user on the same page, checks that against what real users saw in the last 30 days, and works out what each item is for, so it doesn't change a follow-up, an onboarding sequence or a recurring survey that works as intended. Each item gets one suggestion, with its evidence and a confidence level: Keep, Fix, Retire or Review. Nothing changes until you choose the changes and confirm the exact list.
Step 1: Run the auto-start audit
Time: 10 mins
The audit covers all users over the last 30 days. To focus on one group, add it to the prompt, for example "for trial users". The skill first shows a short summary in chat: how many items it checked, the groups of items that can start together, the top problems, and a short walk-through of what a typical user sees. Reply to go on, and it builds a decision tracker with Decision, Owner, Decision date and Applied columns for your team. It asks before it uses a connected spreadsheet tool. Open a new conversation in your AI tool and run this prompt:
Audit everything that auto-starts in our Userflow account.Or open it directly within your AI agent:
Step 2: Apply the changes you approve
Time: 10 mins
Share the tracker with the owner of each item and ask them to fill in the Decision column. Then tell the skill which changes to apply: all Fix items, all Retire items, or a list. It repeats the exact list back and waits for your yes before it changes anything.
Fix changes are saved as unpublished drafts. Your users see no difference until someone publishes the item, and whoever publishes it next ships these changes too.
Retire unpublishes the item straight away. The item and its analytics stay in your account.
Changes to page, URL or element rules are made in the Userflow Builder. The skill gives you the Builder link and the exact change to make there.
In the conversation where you ran the audit, run this prompt to apply every Fix item:
Apply all the Fix items.Or open it directly within your AI agent:
The skill publishes a fixed item only if you ask it to, and shows you the impact before it does.
Part 3: Find and fix broken flows
The Flow review skill checks each live flow for settings that stop it from starting, showing its tooltips or letting users finish, such as a hidden step users can never leave or a button that starts a flow that isn't published. It backs each finding with the last 30 days of live data: views, where users drop off, and how often a tooltip couldn't find the element it points to. The review only reports. It never edits, publishes or unpublishes a flow. It covers flows only, not checklists, launchers, banners, announcements or resource centers.
Step 1: Review your live flows
Time: 20 mins
The skill reviews every flow published in your production environment. With more than about 20 flows, it tells you the count first and offers to narrow the review, for example to one label, to auto-start flows only, or to recently edited flows. The labels from Part 1 make this easy: for example, ask it to review all flows labeled Stage: Onboarding. You get a report ranked as Blockers, Should fix, Worth a look, and Can't check from here, which lists what the skill can't see (such as your Userflow.js installation or the checklist that starts a flow) as questions with a help article for each. The report ends with the single most important fix. Open a new conversation in your AI tool and run this prompt:
Find any problems with my live flows and prioritize them.Or open it directly within your AI agent:
Step 2: Check a flow again after you fix it
Time: 10 mins
Make the fix in the Userflow Builder, or ask the skill to apply it. If you ask, the skill tells you exactly what will change and waits for your yes, and it never publishes the flow. Then review the flow again. Replace [flow name] with the name of your flow and run this prompt:
Review [flow name] again.Or open it directly within your AI agent:
Part 4: Run the health check on a schedule
After you have run Parts 1 to 3 by hand once, schedule them in your AI tool. A scheduled run still stops for your answer before it applies labels, builds the auto-start tracker or changes any item, so open each run when it finishes and answer the skills' questions. The flow review only reports.
Time: 5 mins
Run this prompt to create a monthly scheduled task. See scheduled tasks in Claude · scheduled tasks in ChatGPT.
Create a scheduled task that runs every month with this prompt: Run the monthly Experience Health Check in Userflow. First, find live items that are missing labels and propose labels for them. Then audit everything that auto-starts in our Userflow account for the last 30 days. Then find any problems with my live flows and prioritize them. Don't apply labels or edit, publish or unpublish anything until I approve it.Flows can break whenever your app changes. To catch problems sooner, add a second scheduled task that runs every week or every two weeks with the Part 3 Step 1 prompt and also be sure to set up alerts for real-time notifications.
Keep this handy
The whole playbook takes about an hour the first time. After that, expect about 30 minutes a month.
Question | Answer |
|---|---|
Will the skills change anything without my approval? | No. Optimize labels shows its plan and waits for your yes, and the labels go live as soon as they're applied. Optimize auto-start saves fixes as unpublished drafts and unpublishes items only after you confirm the exact list. Flow review only reports. None of the skills publish an item unless you ask. |
Which plan and access do I need? | The Userflow MCP is included on every plan, and all three skills need it. To apply labels or fixes, you need editor access or above in Userflow. With viewer access, you still get every report, and the auto-start audit ends with a list of changes for an editor to apply. |
Why wasn't a flow with zero views reported as broken? | A flow that doesn't start on its own only gets views when a checklist, launcher, link or your own code starts it. If nothing is starting it, Flow review says so and asks what should. |
Why did the audit suggest Review instead of Retire? | Optimize auto-start suggests Fix or Retire only when it is highly confident. When something is unverified, such as unpublished changes on the item or reach data it can't trust, it suggests Review and says what would settle it. Items first published in the last 30 days get Keep and a re-check, because their data is partial. |
Why doesn't my highest-priority flow start first? | Userflow starts a flow the user has never seen before one they have seen, then the one they saw longest ago, and only then looks at priority. The auto-start audit shows the real start order for each group of items that can start together. |
Why do some findings mention unpublished changes? | Both Optimize auto-start and Flow review read the latest draft of each item. If an item has unpublished changes, what's live may differ from what the skill read, so those items are flagged. Findings from live data always describe the live version. |