There are several ways to start a flow or checklist: automatically with auto-start conditions, from an action in another flow, checklist or launcher, from a link, or from your own code. This page covers each one, plus what happens when more than one flow could start at once.
Start automatically via auto-start conditions
You can automatically start a flow or checklist using auto-start conditions that determine who should see an experience and under what circumstances.
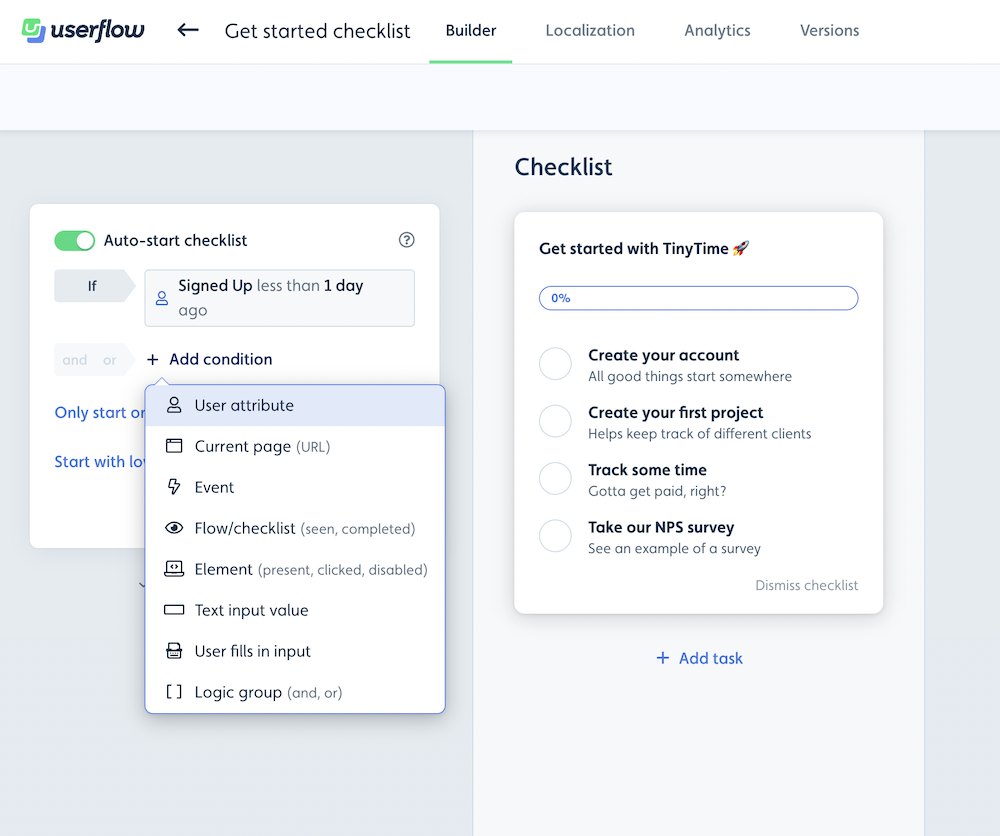
You can start flows and checklists, and target them to the right users, based on:
User attribute: send user/company attributes via Userflow.js, the HubSpot Integration, or the API.
Current page: the page the user is currently on. Userflow tracks this automatically if Userflow.js is installed.
Event: send events that happen outside of flows with userflow.track in Userflow.js, or use no-code event trackers.
Flow/Checklist: start the flow/checklist if another flow/checklist is completed or seen. This condition has no count and no time period. To count completions or look back over a set time, use an Event condition on the Flow Completed event instead. See Start a flow only if another flow wasn't completed recently.
Element: start the flow/checklist if a specific UI element in your app is present/clicked.
Text input value: start the flow/checklist if the user fills in a specific value in a field.
User fills in input: start the flow/checklist if the user fills in any input in a field.
Current time: used for scheduling. Set a date and time that the flow should start before or after.
Scheduling Flows or Checklist for a future date/time
You can use auto-start conditions to schedule a Userflow experience ahead of time. See scheduling a flow or checklist.
Things to know about auto-start conditions
You can combine the conditions and make and/or combinations by, for example, using logic groups.
Once a checklist is started, it will persist on the screen unless it is dismissed.
A Flow will, by default, only start once per user, but you can change it to start unlimited times. If you do this, make sure that it does not restart when dismissed by adding an event condition
Flow started exactly 0 times in the last 1 hr where flow id is <flow id>If you want a few seconds of delay before starting the flow, put a Wait condition first, before your other conditions.
Auto-start conditions are evaluated on page load and on navigation. A condition that depends on a repeated in-page interaction (such as Element is clicked) will not re-evaluate until the user navigates.
Start a flow only if another flow wasn't completed recently
To start a flow only when the user hasn't completed another flow within a set time, use an Event auto-start condition on the Flow Completed event. The Flow/Checklist condition can't do this, because it only checks whether a flow is completed or seen, with no count and no time period.
For example, to start Flow B only if the user hasn't completed Flow A in the last 90 days:
Open Flow B and go to its auto-start conditions.
Add a condition and choose Event.
Pick the Flow Completed event.
Set it to exactly 0 times in the last 90 days where flow id is Flow A's ID.
You can find Flow A's ID under View other ways to start a flow in Flow A's auto-start conditions, or in the builder URL: /app/{company}/flows/{contentId}.
Once 90 days have passed since the user last completed Flow A, the condition is true again and Flow B can start. A flow starts only once per user by default, so if Flow B should come back each time, change Flow B to start unlimited times.
When does a flow auto-start? How often Userflow checks auto-start conditions
Userflow checks a flow's auto-start conditions when the page loads and when the user navigates to a new page. It doesn't check them continuously or on every interaction, so a flow whose conditions become true mid-page starts on the user's next page load or navigation.
This matters most for the Element is clicked condition. Once a flow has started and been dismissed, clicking the same element again on the same page will not start it a second time, because no new evaluation has happened. Navigating elsewhere and back triggers a fresh evaluation, so the flow starts again. This is why it often looks intermittent rather than broken.
If you need a flow to start every time a user clicks an element, use one of these instead:
Track the click as an event. Create a no-code event tracker on the element, then set the flow's auto-start condition to that event rather than to Element is clicked. Events are evaluated as they arrive, so repeat clicks each start the flow.
Use a Launcher. Add a Launcher anchored to the same element with a Start flow action, and turn auto-start off on the flow. A Launcher fires on every click, independent of page loads and navigation.
Start from an action in a checklist, launcher, or flow
You can start a flow/checklist from a checklist, launcher, or flow by adding an action. Each one is shown here: a checklist task, a flow button or trigger, and a launcher.
Checklist task action 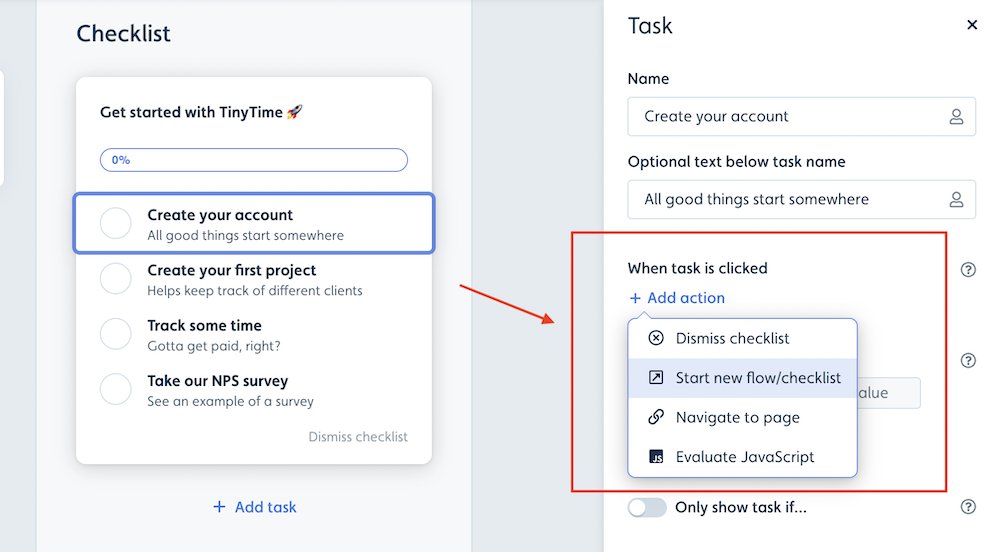
Flow button/trigger action 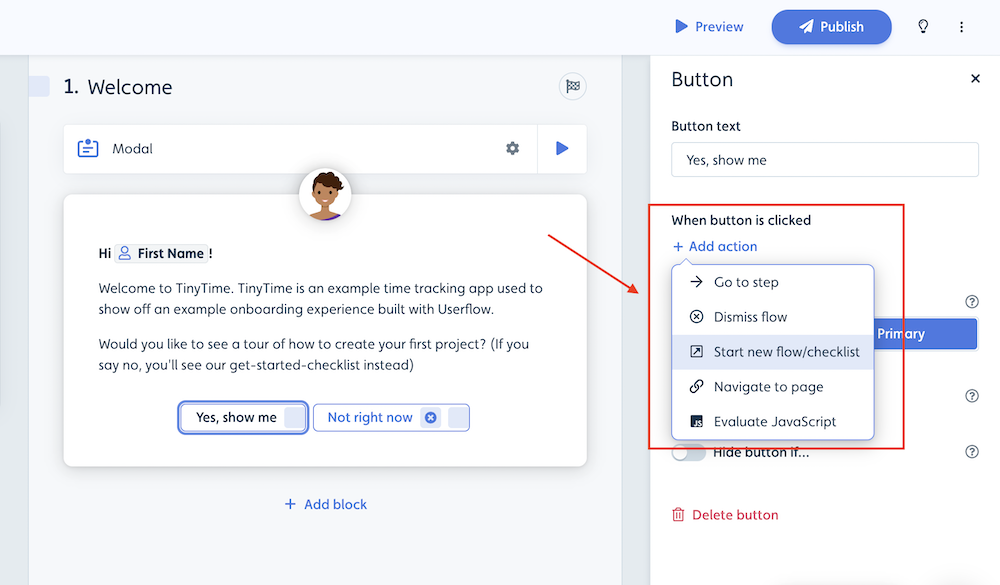
Launcher action 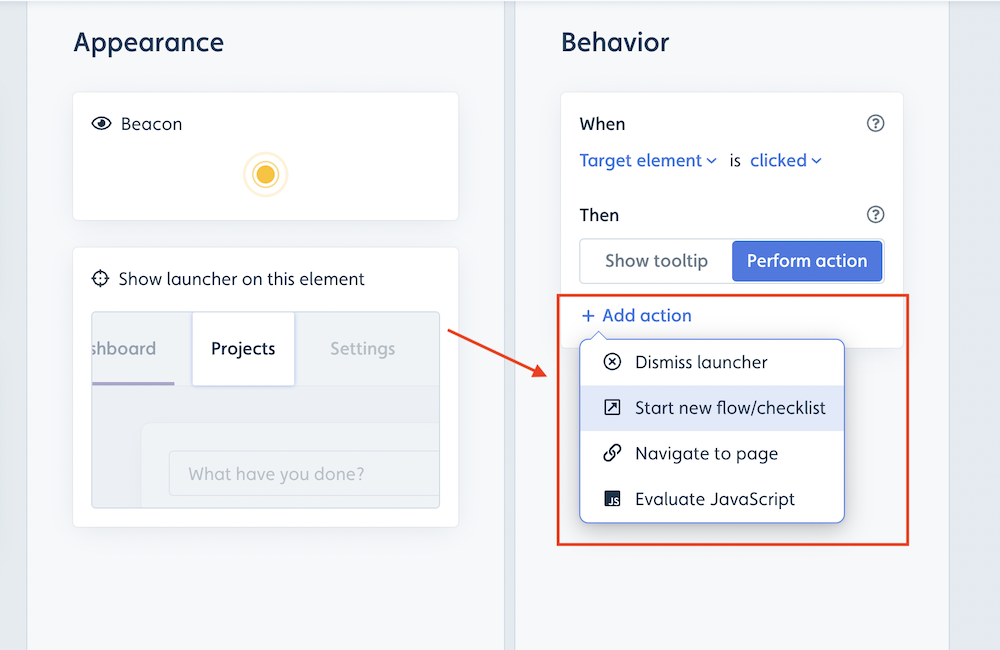
To send users to the right page before the flow starts, see How to navigate to a page when a flow starts.
Start from a link
You can use a link or an embedded button (e.g., in an email or support chat) to start a flow or checklist in your app.
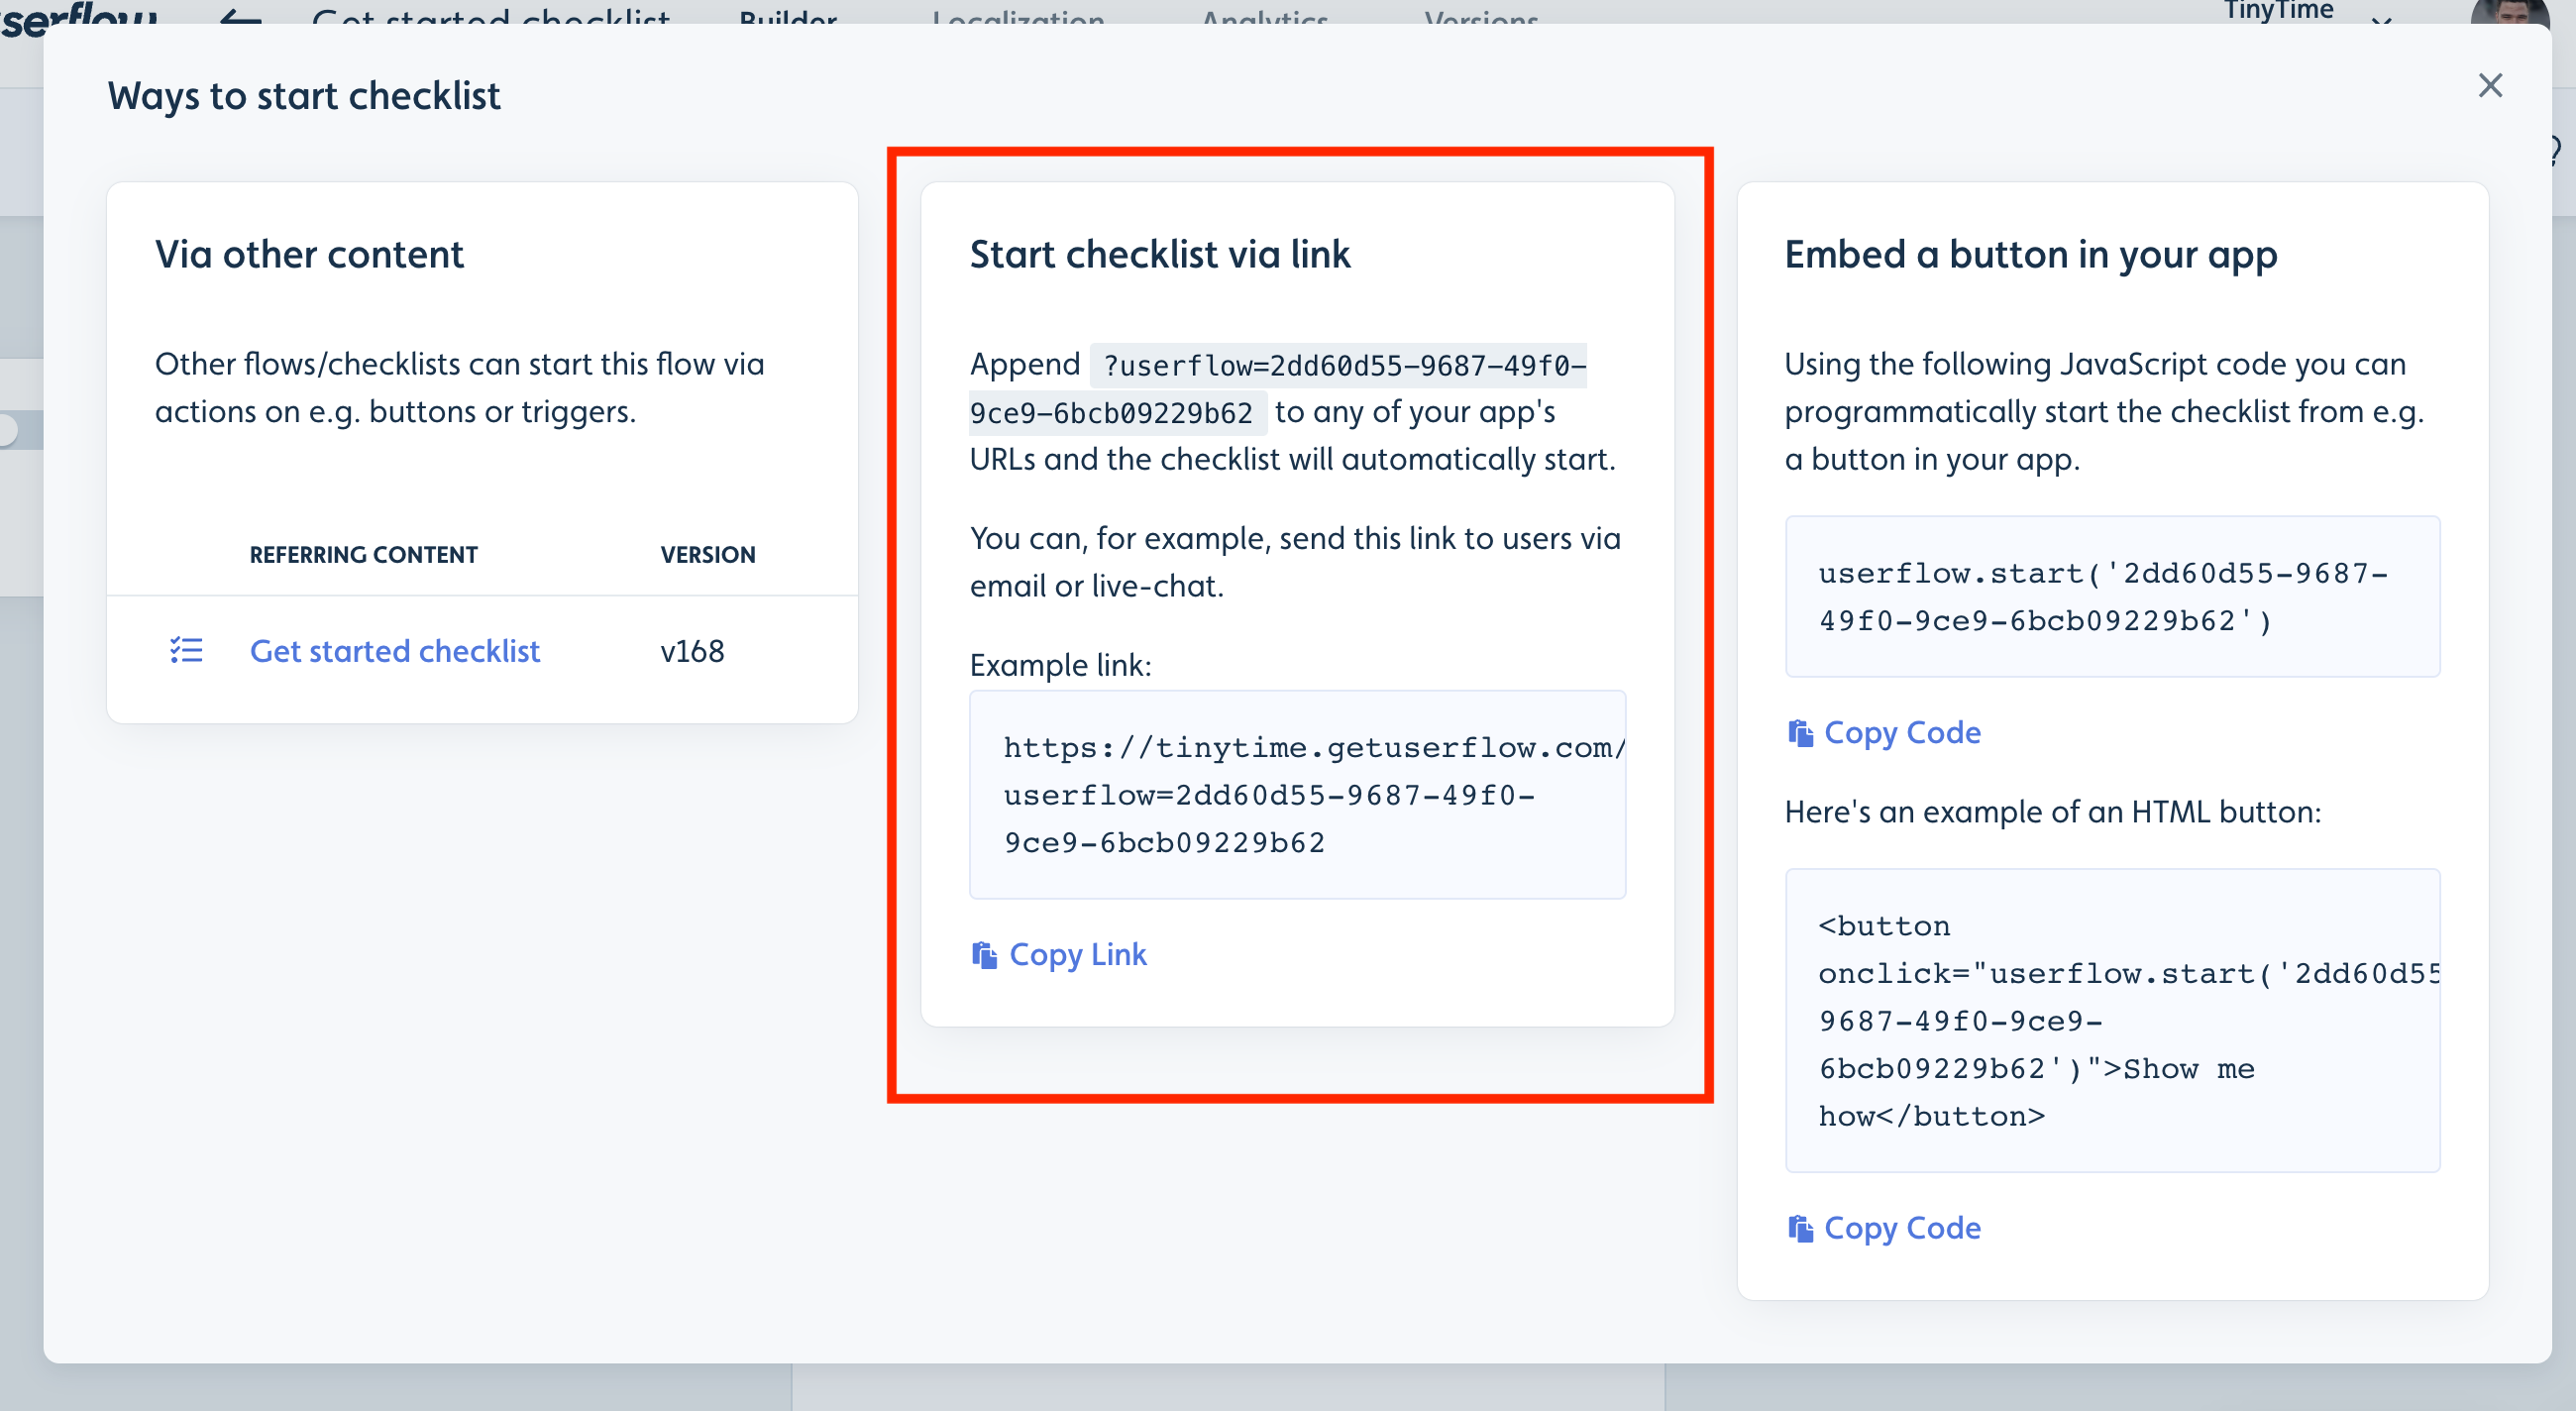
To start a flow or checklist from a link, add
?userflow=<flow id>to the end of any URL in your app. For example, to start a flow onhttps://app.example.com/dashboard, usehttps://app.example.com/dashboard?userflow=<flow id>.
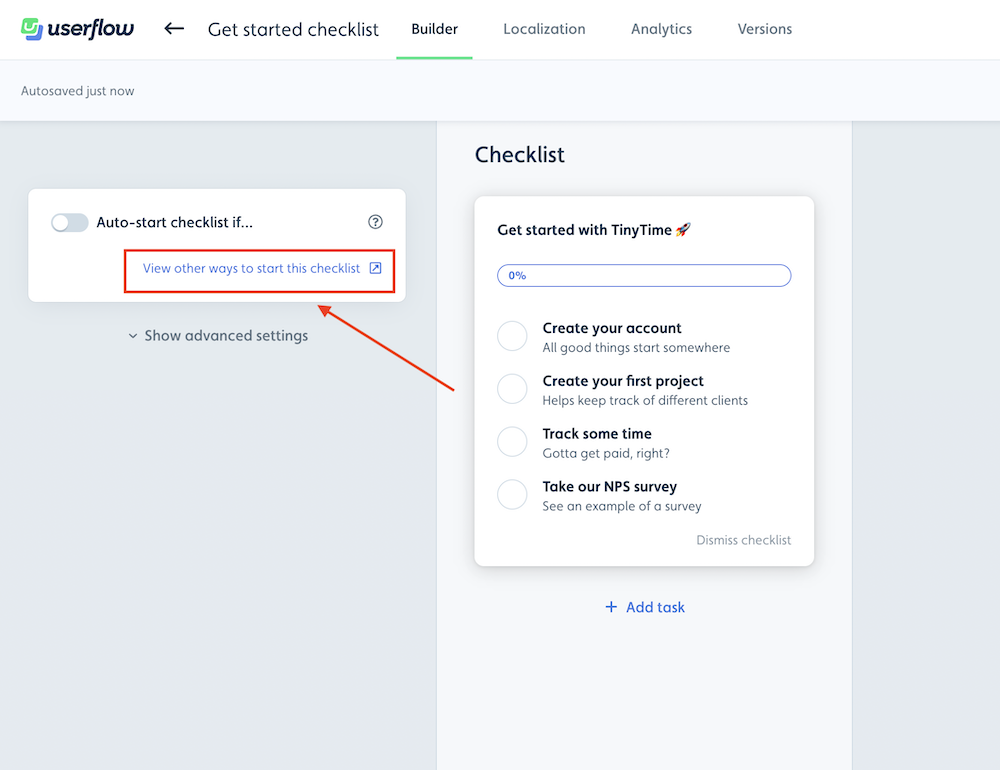
You can find the Flow ID and an example by clicking on View other ways to start a flow by the auto-start conditions.
Start from an embedded button or JavaScript code
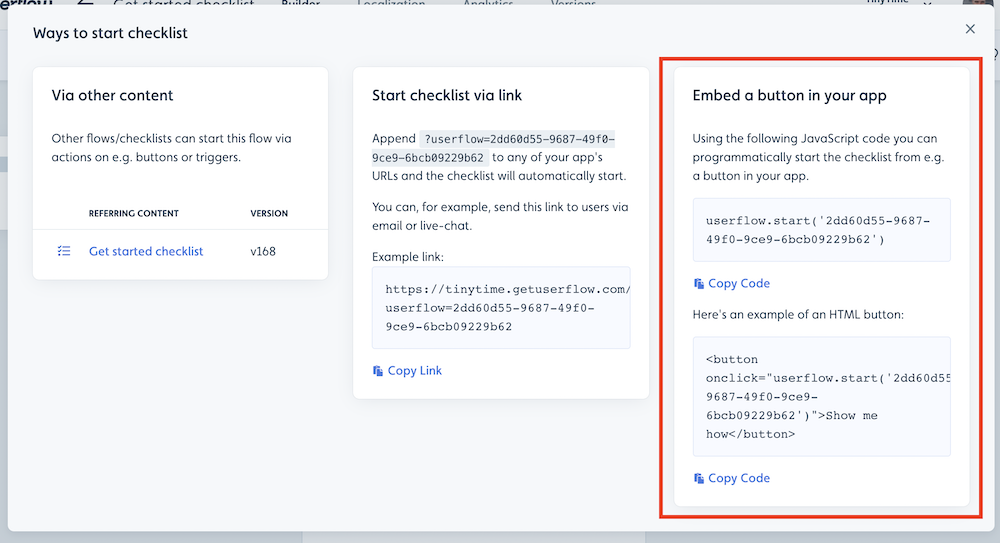
You can start a flow from an embedded button in your application or via JavaScript code in general by using userflow.start(). Refer to this guide to learn more.
How do I find a flow or checklist ID?
To start the flow via userflow.start() you need the content ID (flow ID or checklist ID). This ID is in the View other ways to start a flow tab in the auto-start conditions, and in the builder URL: /app/{company}/flows/{contentId}. See userflow.start().
Which flow starts first? Flow priority
When a user qualifies for more than one auto-start flow at the same time, Userflow starts the flow with the highest Priority (set in the flow's settings). After the user dismisses or completes it, the flow with the next-highest priority can start.
If two or more flows have the same priority, the flow that was created first starts first.
To control which flow users see first, give each flow its own priority, or use auto-start conditions that don't overlap.
Common priority conflicts
When multiple flows are set to start on the same page at the same time, Userflow shows only one. Here's how priority is determined in common scenarios:
Example 1: Banner vs. flow vs. checklist
Setup:
Flow A: Welcome tour (modal)
Flow B: New feature announcement (banner)
Checklist: Onboarding checklist (sidebar)
All three are set to start on page load for new users.
What shows:
First visit: Banner (Flow B) shows first, because banners have the highest priority
After dismissing banner: Welcome tour (Flow A) starts automatically
After completing tour: Checklist appears in the sidebar
Why: Banners always take precedence. Flows start after banners are dismissed. Checklists are always visible (they don't block other content).
Example 2: Two flows targeting the same trigger
Setup:
Flow A: "Feature X tutorial", starts when the user clicks #feature-x-button
Flow B: "Feature X upgrade CTA", starts when the user clicks #feature-x-button
What shows:
Only one flow starts: the one with the higher priority. If both have the same priority, the flow created first starts.
Why: Userflow starts one flow per trigger. When two flows target the same trigger, Userflow picks by priority, then by which flow was created first.
How to fix: Add an auto-start condition to each flow so only one is eligible at a time:
Flow A: Show if "Plan = Free"
Flow B: Show if "Plan = Pro"
Example 3: A "not seen" condition stops a flow for good
A Flow/Checklist auto-start condition set to "not seen" has no time window, so once a user sees the flow it never starts for them again.
Setup:
Flow A: "Dashboard tour", starts on /dashboard with the condition "Dashboard tour is not seen"
Flow B: "New dashboard features", starts on /dashboard with the condition "New dashboard features is not seen"
After a user has seen both flows once:
What shows: Nothing. Neither flow starts for that user again.
Why: The Flow/Checklist condition only checks completed or seen. Once a user has seen a flow, "not seen" is false for that user for good.
How to fix: If a flow should come back after a while, use an Event condition with a time window instead, for example on Flow A: Flow Started exactly 0 times in the last 30 days where flow id is the Dashboard tour's flow ID. Flow A also needs to be set to start unlimited times, or it still starts only once.
Example 4: Debugging why a flow isn't showing
Setup:
You have a high-priority flow that should be showing, but it's not. Another lower-priority flow is appearing instead.
How to debug:
Open the Userflow Debugger (icon in bottom-right corner)
Click on your flow in the list
Look at "Why is this flow not starting?" section
Common reasons:
"User has already seen this flow" (hidden condition blocking)
"Another flow is currently active" (priority conflict)
"User does not match audience rules" (targeting issue)
What if the flow/checklist doesn't start?
If you used one of the methods above and your flow or checklist does not start, see Flow not starting to identify the possible cause.