Checklists serve as powerful anchors for new user onboarding. If your users temporarily navigate away from your guided experience, they can easily return or explore alternative tours through the Checklist. Showing users how they are progressing through the checklist can deepen their engagement with your product and give them a sense of achievement.
You can display a checklist in the Resource Center or embed the experience directly on a page in your app, providing always-on, contextual guidance.
How to build checklists
Checklists work similarly to flows - they can have auto-start conditions and are published to your app. If a user is eligible for a checklist, they’ll see it in their Resource Center or embedded in your app.
How to embed a checklist
To learn how to embed a checklist, refer to the Embed a Banner or Checklist article.
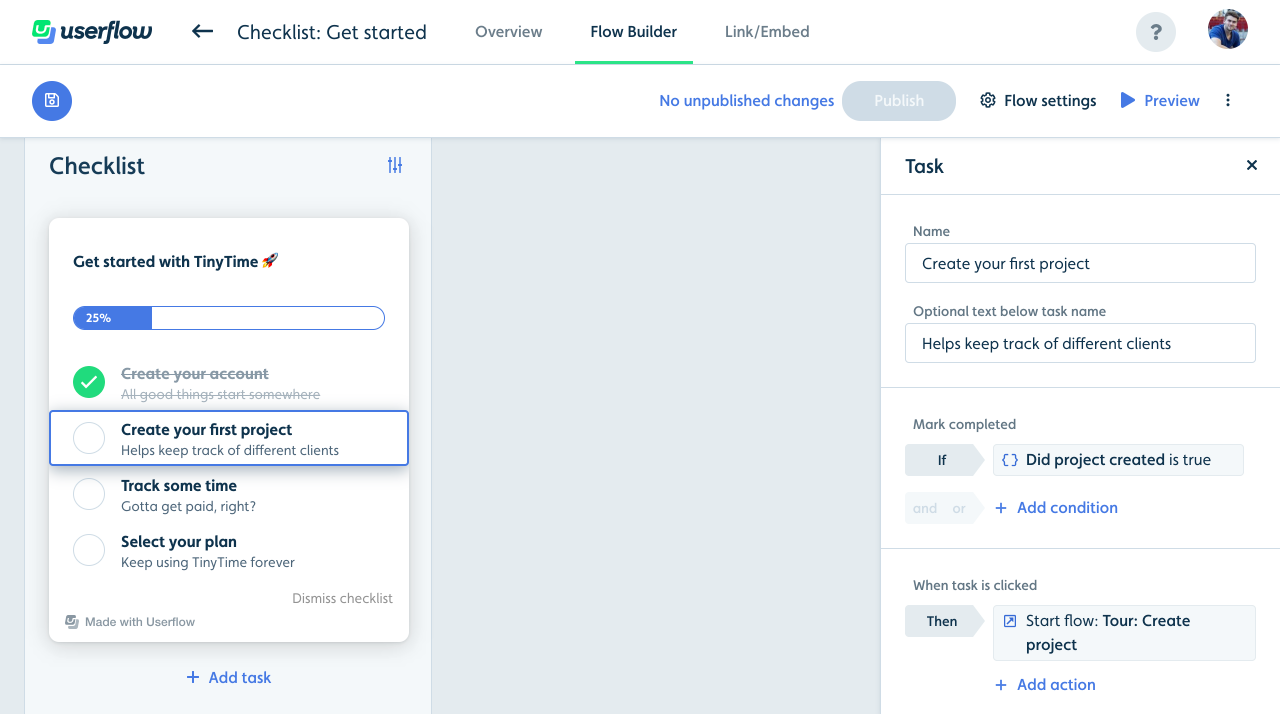
You can add as many tasks as you would like. Each task has a name, an optional subtitle, a completed condition, and one or more actions. For example, a completed condition could be when users have created their first project in your app, and the action could be to start a tour showing the user how to do so.
What users see
Once a checklist is triggered for a user, it appears in the lower right corner (by default) if part of your Resource Center. If it is embedded in your app, they will see the checklist with the placement and branding you’ve applied.
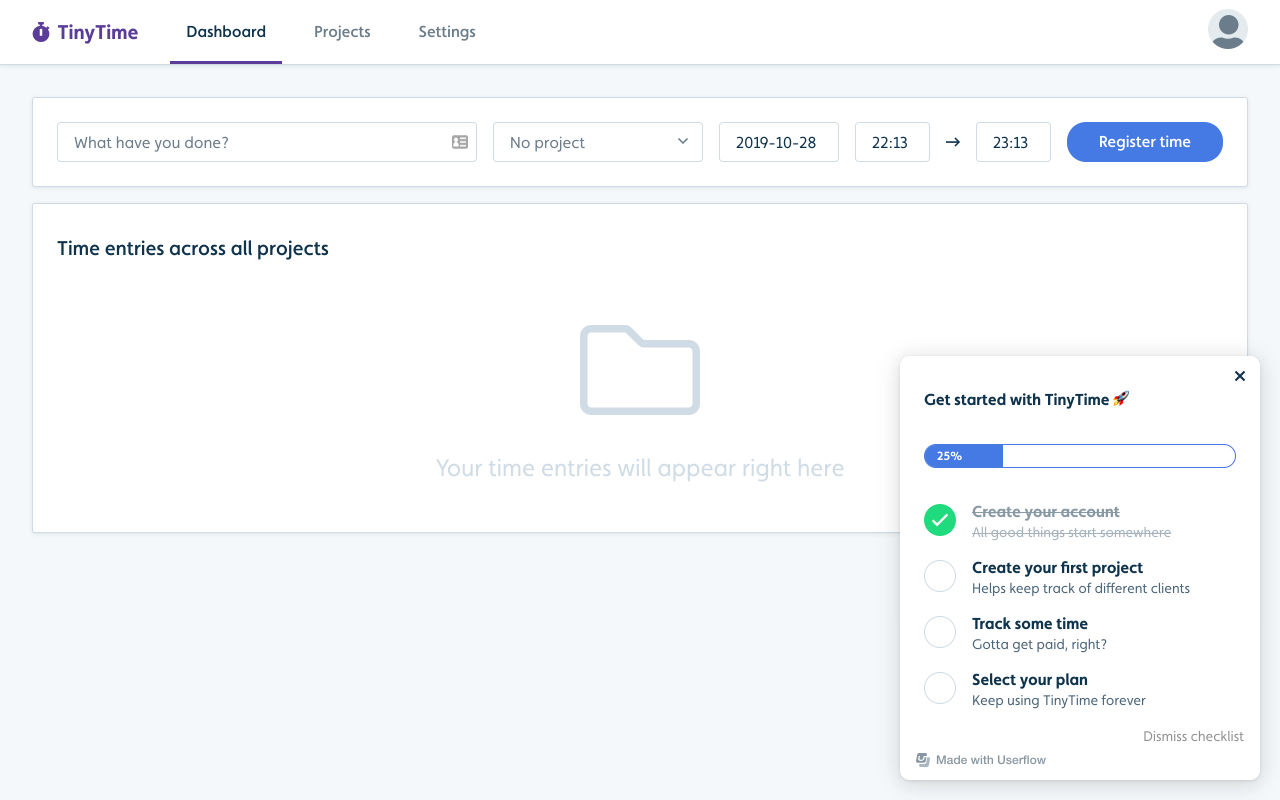
When a task is selected, its associated actions, such as initiating a flow or navigating to a page, are executed. If the user minimizes it, a launcher button (marked “Get started”) appears in the same corner, featuring a circle with a number that indicates how many tasks remain to be completed.
Upon completing a task, the checklist is shown automatically, and the progress bar at the top updates on its own as users finish tasks.
Create a checklist
Select Checklists from the sidebar, then click Create checklist.
Select a task in the list and edit its details in the Task panel on the right. Edit the name, include (optional) text to describe the task.
Define the action that will occur when the task is clicked. Assign one or more actions that will start a flow, open another page, set an attribute, dismiss a checklist, or even invoke custom JavaScript code in your app.
.png)
Select the conditions that will mark the task complete.
.png)
Preview the checklist and publish when complete.
Completing a checklist task based on flow completion
To mark checklist tasks as completed when users have seen or completed a flow, you can set the following condition:
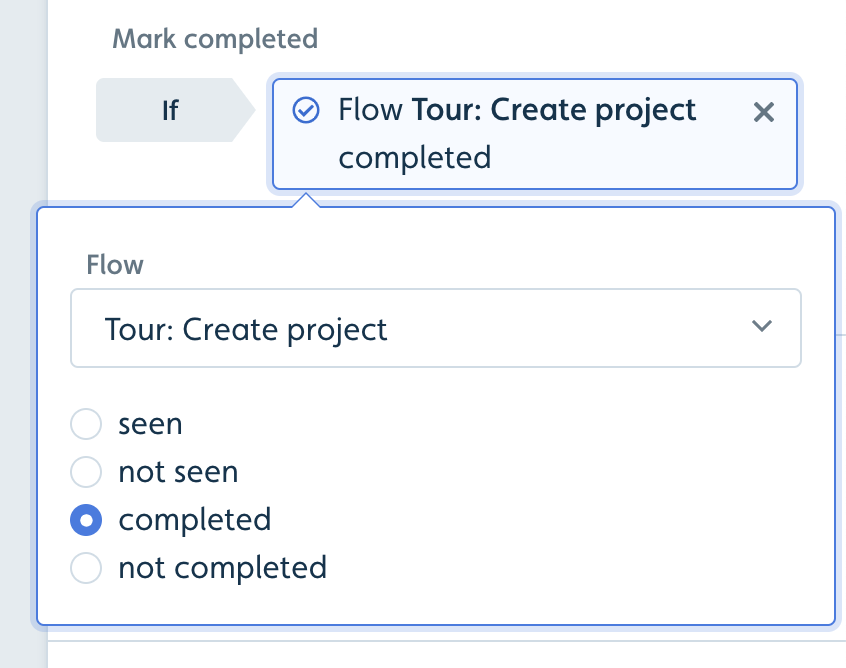
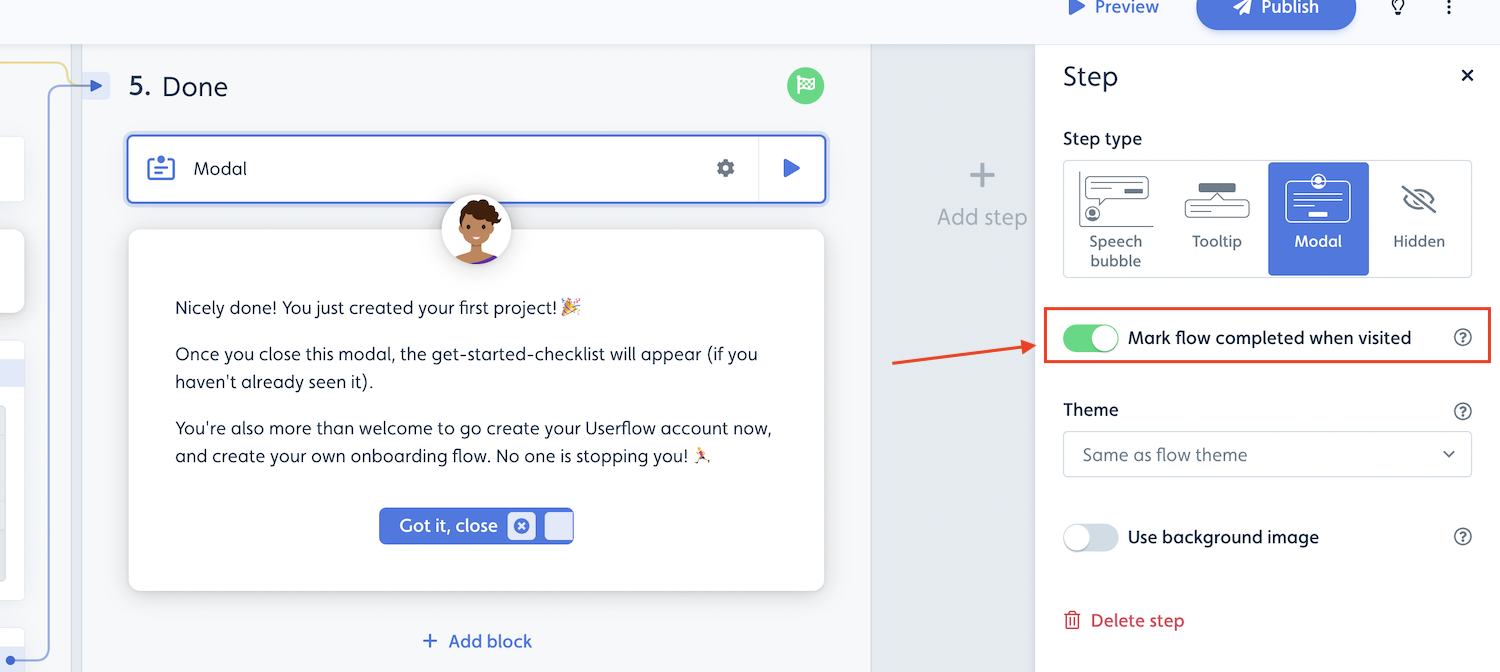
To ensure that a flow is considered completed, you also need to make sure that the flow itself has one or more completion steps toggled on.
Customizing the look and feel of your checklist
Like other Userflow content, you can edit your Checklist and Checklist Launchers look-and-feel, as well as position in the theme editor. (Go to Settings -> Themes). Learn more about the theme editor
Checklist z-index
In some cases, a checklist may appear on top of or below an object instead of where you want it to appear. In this case, you can change the checklist z-index in the theme settings to reposition the checklist.
Select Settings > Themes in the sidebar,
Edit or create a theme.
In the Checklist section of the Checklist editor, change the z-index to reposition your checklist.
Dismissing a checklist
Users can dismiss a checklist by clicking Dismiss checklist at the bottom of the checklist. You can prevent users from dismissing a checklist by toggling the Prevent users from dismissing checklist in the advanced settings of the checklist (below auto-start conditions).
Hiding a checklist and the checklist launcher conditionally
A checklist, including the checklist launcher, remains persistent once started, so it will continue to show until it is either dismissed by the user or hidden using temporary hide conditions. If you want to hide a checklist that has already been started on a certain page or in a particular scenario, you will need to add a temporary hide condition.
If you have the checklist embedded in a resource center, and you are hiding the resource center and its launcher conditionally, and you also want to hide the embedded checklist and its launcher, you can achieve this similarly by using temporary hide conditions. The checklist and resource center are distinct content types, despite the checklist being embedded within the resource center.
Finally, note that if you don’t want to start a checklist altogether for a user, you should not use temporary hide; instead, exclude them from starting it by, for example, using a condition in the auto-start conditions.
Custom checklist launcher
By default, when users minimize a checklist, Userflow’s launcher button shows in the corner of the page. When users click it, the checklist will reappear.
However, we do have a couple of controls that allow you to create your own custom launcher to display the checklist.
In the Checklist builder, uncheck Show launcher when minimized in the Checklist settings panel. Optional: If you want to remove the Dismiss checklist button and prevent users from dismissing the checklist, also check Prevent users from dismissing the checklist.
Add a button in your app with a JavaScript click handler that runs userflow.start(checklistId), where checklistId is the ID of your checklist (find this under the Link/Embed tab).
Learn more
Refer to articles on building Resource Centers and Launchers.